Ribbon Basket Plain Weave Tutorial

This Ribbon Basket Plain Weave is designed for beginner weaver (age 8+)
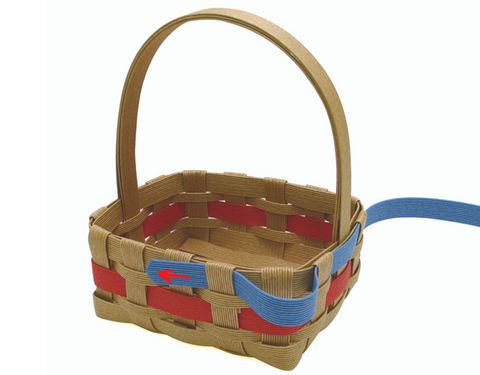
Finished Dimensions: 11cm x 13.5cm x 6cm (Approximately 18cm with handle)
| Important Notes! - Gorilla Wood Glue is highly recommended for best results. - Different color strips are used in photos for the applicable step. - Finished item may vary slightly in size from the dimensions above. |
Skill level: ★★☆☆☆
Supply list
- KaGOcraft's 15mm Craft Band
- Gorilla Wood Glue
- Scissors
- Clips or Clothespins
Prepare the Craft Band 15mm for this project
Color A: Main Color of the Basket Pastel Mocha Vanilla Total 763cm
Color B: Accent Color Cherry Total 75cm
| Name | Length | Pieces | Width | Color | |
| 1 | Horizontal strip | 13.5cm | 4 | 12 | A |
| 2 | Horizontal strip | 37cm | 2 | 12 | A |
| 3 | Horizontal strip | 100cm | 1 | 12 | A |
| 4 | Support strip | 11cm | 2 | 12 | A |
| 5 | Vertical strip | 34cm | 5 | 12 | A |
| 6 | Reinforcement strip | 13.5cm | 2 | 12 | A |
| 7 | Weaving strip | 54cm | 2 | 12 | A |
| 8 | Weaving strip | 54cm | 2 | 6 | B |
| 9 | Weaving strip | 54cm | 1 | 12 | A |
| 10 | Rim strip | 55cm | 2 | 12 | A |
| 11 | Handle filler | 44cm | 1 | 12 | A |
| 12 | Bow | 16cm | 1 | 12 | B |
| 13 | Bow | 5cm | 1 | 12 | B |
Procedure

Step 1. Make the base. Arrange Horizontal strips 1, 2, & 3 as shown. Place the longest horizontal strip in the middle. Make sure that all of the strips are centered.

Step 2. Glue the Support strips along both sides as shown.

Step 3. Turn over, and glue Vertical strips along both sides as shown. Make sure they are centered.

Step 4. Flip back to the front side. Take two of the vertical strips and weave as shown, alternating over and under.

Step 5. Push out to either side.

Step 6. Weave the last vertical strip in the center, taking care to reverse the over and under effect from Step 4.

step 7. Glue the Reinforcement strips along the top and bottom as shown.

Step 8. Fold all strips upward as shown.

Step 9. Take a weaving strip and place the end behind the second vertical strip and secure with a clip or clothespin. Weave alternately, use clothespins to help keep in place.

Step 10. Slightly fold corners to keep in place.

Step 11. After weaving the first row cut off any excess and glue.
Make sure that the ends are hidden by the vertical strips.

Step 12. Using a new (8) Weaving strip, start the second row at the 3rd vertical strip on the opposite side of the basket to maintain an even thickness. Weave over and under.

Step 13. Repeat weaving with the remaining Weaving strips as shown, until 5 rows are completed. Gradually pull the vertical strips to tighten the gaps between the rows.

Step 14. For all of the vertical strips on the outside of the top row, fold inward.

Step 15. Cut off excess as necessary and tuck the ends into the 3rd row from the top. Ends should be unseen.

Step 16. Place the Inner Rim strip between the 5th row strip and the remaining vertical strips for reinforcement as shown.

Step 17. Except Handle strips, all the strips in side of the top row, fold outward.

Step 18. Tuck them into 3rd row.

Step 19. Make the handle of the basket using the longest Horizontal strips. Take one end and tuck down to the bottom on the opposite side of the basket.

Step 20.Take other end and tuck down to the bottom on the opposite side of the basket.

Step 21. Apply glue to the (3) Horizontal strip and adhere to (11) Handle filler strip.

Step 22. Take the end of handle filler and tuck down to the bottom on the opposite side of the basket.
Step 23. Trim one end of the other Rim strip to make a point. Insert through every other vertical strip as shown. The weave pattern should be the same as the third row from the top.

Step 24.The end of the Rim strip should be hidden by a vertical strip to maintain a seamless look.

Step 25. Using the longest (12) Bow strip, lightly fold both sides and glue as shown.

Step 26. Wrap (13) Bow strip around the center, hiding the seam.
Step 27. Glue the bow to the basket as shown and it's done!